Unlock Your Artistic Potential with These Zebra Drawing Techniques
- Introduction
- Understanding the Anatomy of a Zebra
- Tools and Materials Needed for Zebra Drawing
- Step-by-Step Guide to Drawing a Realistic Zebra
- Tips for Adding Detail and Texture to Your Zebra Drawing
- Exploring Different Styles of Zebra Drawing
- Common Mistakes to Avoid in Zebra Drawing
- Using Color in Your Zebra Drawings
- Top 10 Tips for Creating Realistic Zebra Drawings
- FAQ’s
- Basic Techniques
- Advanced Techniques
- Artistic Considerations
Introduction
Zebra drawing is an exciting and rewarding journey that opens up a world of creativity. Imagine capturing the striking black-and-white stripes of these magnificent animals on paper. Whether you’re a seasoned artist or just starting, there’s something uniquely satisfying about sketching a zebra.
These creatures are not only beautiful but also offer intriguing challenges for artists. From their complex anatomy to their stunning patterns, each element invites exploration and experimentation. Ready to unleash your artistic potential? Let’s dive into the fascinating world of zebra drawing!
Understanding the Anatomy of a Zebra
Zebras are fascinating creatures, known for their striking black and white stripes. Understanding their anatomy is key to creating accurate drawings.
Their bodies are robust, with a strong neck that supports a large head. The muzzle is broad, giving them an expressive face that’s full of character.
Take note of their long legs; these help zebras run swiftly across the savannah to escape predators. Their hooves are sturdy, designed for various terrains.
The mane stands erect and has short hair that adds texture to your drawing. Observe how it flows along the back and complements the overall structure.
Additionally, pay attention to their tails—short yet powerful—used for swatting away flies. Every detail contributes to the zebra’s unique silhouette.
When capturing zebras on paper, consider not just the stripes but also how each anatomical feature interacts with others in motion or at rest.
Tools and Materials Needed for Zebra Drawing
To create stunning zebra drawings, having the right tools at your fingertips is essential. Start with quality graphite pencils. These allow for varying degrees of shading and detail.
Next, invest in good-quality paper. Smooth bristol board or sketch pads work wonders for pencil sketches. They provide a solid surface that enhances precision.
Don’t forget about erasers; both kneaded and vinyl types are beneficial for correcting mistakes and adding highlights to your drawing.
For added depth, consider using colored pencils or markers if you want to introduce color into your artwork. They can help bring those iconic stripes to life.
A blending stump or cotton swabs can be useful for smoothing out lines and creating seamless transitions between shades. With these materials on hand, you’re ready to unleash your creativity!
Step-by-Step Guide to Drawing a Realistic Zebra
Start by sketching a simple outline of the zebra’s body. Use light pencil strokes to create an oval for the torso, a smaller circle for the head, and lines for legs. This basic framework will guide your proportions.
Next, refine your shapes into more defined outlines. Add curves to suggest muscle and movement. Pay attention to where the legs connect; they should align naturally with the body.
Now it’s time to focus on facial features. Draw big expressive eyes just above the snout area. Capture that unique mane by adding short zigzag lines along its crest.
Once you’re satisfied with these details, begin incorporating stripes! Follow the natural contours of the body when placing them—zebras have variable patterns that can be quite captivating.
Go over your lines with a darker pencil or ink once you’re happy with everything. Embrace imperfections; they add character!
Tips for Adding Detail and Texture to Your Zebra Drawing
To truly bring your zebra drawing to life, focus on texture. Start with the fur. Use short, quick strokes to mimic its coarse quality. Layering these lines will create depth.
Next, pay attention to the stripes. Each one has a unique curve and contour that reflects how light hits it. Vary the width of your stripes for added realism.
Don’t forget about shading! Lightly shade areas where shadows naturally fall—underneath the belly and around the legs can add dimension.
Use blending tools like tortillons or even your fingers to soften harsh lines in certain areas while keeping others sharp for contrast.
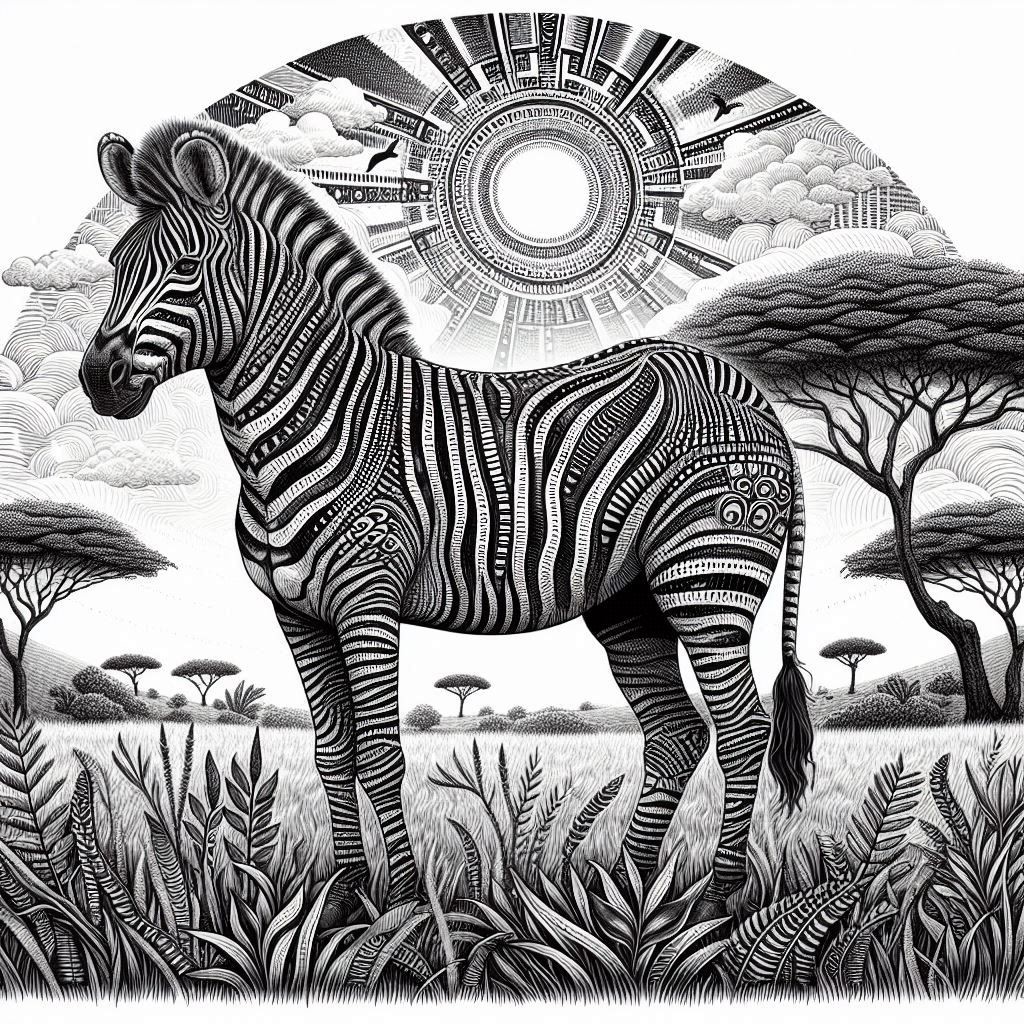
Consider adding subtle background elements like grass or foliage which can enhance the overall composition without detracting from your zebra’s beauty. This balance between detail and simplicity is key in making your artwork striking yet harmonious.
Exploring Different Styles of Zebra Drawing
Zebra drawing offers a canvas for creativity. You can choose from various styles that transform the traditional approach.
Realism captures every stripe and shadow, bringing lifelike detail to your artwork. This style focuses on accuracy and precise anatomy.
Alternatively, try abstract zebra drawings. Here, you can play with colors and shapes, turning the familiar into something entirely new. It’s all about expressing your unique vision.
Cartoon zebras provide a playful twist. Exaggerated features and bold lines create a fun interpretation that’s perfect for lighthearted projects.
Exploring each style allows you to discover what resonates with you as an artist. Don’t hesitate to mix techniques or invent your own approach! Each method has its charm and potential for expression in zebra art.
Common Mistakes to Avoid in Zebra Drawing
When diving into zebra drawing, it’s crucial to steer clear of common pitfalls that can hinder your progress. One frequent mistake is neglecting the anatomy. Understanding a zebra’s structure will elevate your artwork and make it more realistic.
Another misstep often seen is rushing through the sketching phase. Take your time; building a solid foundation leads to better results later on.
Many artists also overlook the importance of proportions. Pay attention to how different body parts relate to one another for a balanced appearance.
Avoid using flat lines when defining stripes. Instead, try varying line weights and curves for added depth.
Don’t forget about shading techniques! Shadows bring life to your work, so practice layering tones effectively for dimension and realism in your drawings.
Using Color in Your Zebra Drawings
Adding color to your zebra drawings can elevate them from simple sketches to vibrant pieces of art. While zebras are known for their iconic black and white stripes, introducing hues can create a unique twist.
Consider using soft pastels or colored pencils for subtle effects. Shades like light beige or warm gray can enhance the natural beauty of the animal without overwhelming its classic look. Alternatively, experimenting with bold colors might yield stunning fantasy interpretations.
You could also play with backgrounds that complement your zebra’s colors. A lush green savanna or a sunset backdrop will add depth and context to your artwork.
Remember, layering is key when working with color. Build up tones gradually to achieve richness while still capturing the essence of the zebra’s form. This approach allows for refinement in both texture and vibrancy, leading to more dynamic creations.
Top 10 Tips for Creating Realistic Zebra Drawings
Creating realistic zebra drawing can be both rewarding and challenging. With practice, you can elevate your art to new heights. Here are ten essential tips to help you on this journey.
1.Study Real Zebras**: Spend time observing real zebras in photographs or at zoos. Pay attention to their anatomy, posture, and the way light interacts with their bodies.
2. Master Basic Shapes**: Start by sketching basic shapes that form the zebra’s body—ovals for the torso and circles for the head—to establish proportions before adding details.
3. Focus on Proportions**: Ensure your proportions are accurate; a well-proportioned zebra will look more realistic. Use reference images as guides.
4.Emphasize Stripes**: The iconic stripes define zebras’ appearance but vary between individuals. Look closely at how they flow over the body while drawing.
5.Pay Attention to Textures**: Zebras have unique fur textures that catch light differently than smooth surfaces do; use techniques like cross-hatching or stippling for depth.
6.Use Appropriate Tools**: Invest in quality pencils, erasers, and paper suited for detailed work; these tools significantly affect your final piece’s quality.
7.Practice Shading Techniques**: Learn different shading methods like blending or layering colors to create dimension and realism in your drawing.
8.Experiment with Angles**: Try drawing from various angles rather than just side profiles; this adds interest and complexity to your artwork.
9.Add Background Elements Wisely**: A well-chosen background can enhance your zebra drawing without overpowering it—think about habitat elements that complement your subject.
10.Seek Feedback & Revise Work**: Don’t hesitate to share your artwork with others or seek constructive criticism—it helps refine skills and improve future pieces dramatically.
With dedication and these handy tips under your belt, you’ll find yourself unlocking new levels of creativity in zebra drawing!
FAQ’s
Basic Techniques
To start a zebra drawing, you’ll need basic materials such as a sketchpad, pencils (preferably ranging from H to B), an eraser, and optionally, black and white markers or pens if you want to finalize the drawing.
Begin by lightly sketching the zebra’s body shape and outline. Once the basic shape is established, draw the stripes by following the natural curves of the zebra’s body. Make sure the stripes vary in width and are spaced unevenly to mimic the natural pattern.
To achieve realistic shading, observe how light and shadow fall on a zebra’s body. Use a range of pencil grades to create gradient effects, and blend the shading smoothly. Pay attention to the direction of the fur and incorporate subtle gradations to enhance realism.
Advanced Techniques
To give your zebra drawing a three-dimensional look, use shading and highlights effectively. Apply darker shades where shadows naturally occur and lighter tones where light hits the zebra. Adding fine details and texture to the stripes will also enhance the 3D effect.
Common mistakes include making the stripes too uniform, ignoring the zebra’s anatomy, or not varying the stripe thickness. Ensure you observe reference images to capture the unique characteristics of zebra stripes and body structure.
To draw a zebra in motion, study references of zebras running or walking. Focus on dynamic poses and use action lines to capture movement. Pay attention to the positioning of the legs, the flow of the mane, and the shifting stripes to convey a sense of action.
Artistic Considerations
Yes, you can use color to add an artistic touch to your zebra drawing. Although zebras are naturally black and white, adding colors can create interesting effects or highlight certain aspects of your drawing. Just be sure to maintain the integrity of the stripes.
To incorporate a zebra drawing into a larger artwork, consider the context and composition. Place the zebra in a suitable background, such as a savanna or jungle scene, and adjust the scale to fit with other elements in your artwork. This integration can make your drawing more cohesive and visually appealing.
You can experiment with various styles, such as realistic, abstract, cartoonish, or even mixed media. For a unique touch, try using different textures, patterns, or color schemes to express your personal artistic vision.
To develop your own style, practice drawing zebras in various ways and explore different techniques. Analyze the work of other artists for inspiration, but focus on what aspects you enjoy and want to emphasize in your drawings. Over time, your personal style will naturally emerge through consistent practice and experimentation.

